The purpose of this blog is to journal the progress of Mr. Dubuque's IB Technology class that meets on Day 3, period 3. This class is constructing a full size scale raptor dinosaur.

The Finished Raptor
March 7 raptor

This is the raptor as of March 7
Our Raptor in progress

Half way done! Jan. 28
Blog is Made

Bryan is making the blog.
The "MAN SAW"

This is the powerful saw that our class renamed from Ban Saw to MAN SAW
Tuesday, June 7, 2011
THE RAPTOR IS DONE!
The raptor is finally done. Today we finished touching up the claws in black paint. We also made the eyes. We felt it looked great and soooo much better than the last raptor in Rippowam. Finally, we painted the base brown to look like dirt. We think it is a hue accomplishment.
Thursday, April 14, 2011
Wrapping Plaster Wire Around Stomach
Today we had to finish plastering the body of the raptor. The only part left to plaster of the body was the stomach. We felt that it was hard to stick the plaster on upside-down so, we cut strips of plaster of about 4 feet long so we could wrap it around as you see below.
Friday, April 8, 2011
Plaster Craft ------ Day 2
Today we continued wrapping the plaster craft on the raptor body. This week we accomplished putting plaster craft on the bottom of the torso of the raptor and putting a second coat on the top of the torso, head, and arms. We thought it looked even better today because when the plaster craft dried it felt hard and looked easier to paint on.
Plaster Craft
Last week we started putting on the plaster craft. Afterm we cut the plaster craft into strips of about one foot, we wood soak them in a bucket of water. Then we would stick them on the raptor. We completed the head, claws, top of the torso, and the tail. We felt that it was starting to look like a real raptor.
Tuesday, March 29, 2011
Taping the Claws
Since we were not ready to plaster the structure yet, the rest of our class taped up the claws. We felt that the claws were not sturdy enough to hold the plaster because they were only paper. We cut and wrapped masking tape around the claws on the hands on feet.
Cutting Out Plaster
Two weeks ago we decided to use plaster instead of paper mache because we thought the plaster would hold up better. Today, we cut out the strips of plaster. The strips of plaster were very long so, we cut them into about 1 foot strips. Then, after we were done finishing cutting, we put them in a box to save for next week because we felt that we would not have enough time to water them and put them on the raptor today.
Thursday, March 24, 2011
Wheels Are Rotated
This week in art, there were only two of us in art so we just fixed up one thing before we plaster the chicken wire. When we rolled the raptor into the classroom, we felt that the wheels were not smooth. We saw that the swively wheels were in the back and the wheels that do not swivel were in the front. We felt that the swively wheels should go in the front so it turns easier. In effect, the un-drilled the wheels out and drilled them back in the opposite way so that the swively wheels were in the front and the non-swively wheels were in the back. It seemed alo smoother when it turned.
Monday, March 7, 2011
The Claws
In addition to the repairs, today we also put on the claws. After the girls finished rolling them up, they taped them onto the chicken wire on the hands.
They also put on the feet claws.
The Repairs
For most of the class-time, we repaired the chicken wire on the body of the raptor. If there was extra open parts, we covered them. Also, if we thought parts were too big or too small we cut them or added. To save our resources, instead of using new rolls of chicken wire, we used the old small scraps. In fact, most of them were the right size.
The following pictures show most of the repairs we did; including the neck and the bottom of the torso.
The following pictures show most of the repairs we did; including the neck and the bottom of the torso.
Tuesday, March 1, 2011
Chicken Wire on the Neck
We started to put the chicken wire on the neck. We thought maybe we could use the extra scraps of chicken wire, but we felt that it was too small and it did not work. So, we took a fresh piece of chicken wire and measured to size. Then we wrapped it around the wooden neck.
Head goes on
Today, we also connected the head back on to the body. We had to drill it to the neck.
After we drilled it in, we felt that it was hanging over too much and it looked like it was going to fall. So, we took another piece of wood. First, we put it aside the neck-head structure and measured where we would cut it so that it would not be too tall. Then, we cut it with the band saw. Finally, we drilled it in to the neck.
After we drilled it in, we felt that it was hanging over too much and it looked like it was going to fall. So, we took another piece of wood. First, we put it aside the neck-head structure and measured where we would cut it so that it would not be too tall. Then, we cut it with the band saw. Finally, we drilled it in to the neck.
Stomach/ Under-torso
Today the class was finishing putting on the putting part of the torso with chicken wire. This was one of the last steps until the paper maching. As they tried to attach the chicken wire to the top (back) part of the torso, they ran into a small problem. They looked at it a couple of times and felt that it was to long. So, they cut the chicken wire again after measuring it. Then, they looked at it AGAIN and it was still too long. So, again they cut the chicken wire. Finally, it was the right size.
Wednesday, February 16, 2011
Chicken Wire Under the Torso
Today the boys started to add the chicken wire underneath the torso. They had measured it already and felt that they had cut it to the right size. It turned out that the chicken wire was cut too big. So, they had to measure again. Then, they started to connect it, but time ran out in class. Next week they hope to finish it. They felt the new size will look better.
The Base
The girls are now planning what the base s going to look like. They are dicussing the designs and colors on it. At first, they felt that they should just make it plain green like the raptor and Rippowam's colors. Then, they thought that they should put school inspired designs. They came up with books, and notebooks and pencils and sports. They still have to design it. They also decided the color. It is going to be a Rippowam green background.
Thursday, February 10, 2011
The tail structure going on!
The boys are now putting the tail structure on. They had to cut part of it so that it stays. We also felt that it will not stay up, so for now we put a piece of wood underneath it to keep it up.
Cleaning!
The girls are soon going to put the paper mache on the chicken wire tail. But first, they had to clean the area. As you can see below they were washing and scrubbing and scraping the counter.
The Tail
The boys are now stating to cut the tail to fit the right size that we need for the body.
They measured how much they needed before.
Stapling the Chicken Wire for Torso
We are now stapling the chicken wire to the wood structure on the torso so it will stay. As you can see in one of the pictures below, we messed up on stapling in the wrong place. After we stapled it we felt that it did not work.
Friday, February 4, 2011
Torso
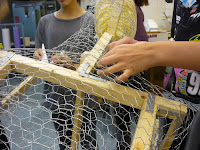
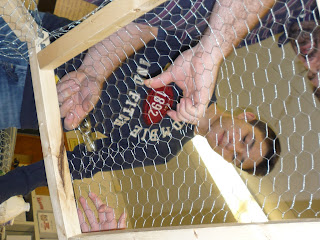
In these pictures below we are putting the chicken wire on the torso.
At first we had to measure the torso so that we would have the exact measurements for the right amount of chicken wire. They were wrapping it around the wood frame.
In the middle picture we were wrapping the two pieces of chicken wire around each other. The little strips out of wire were being put together.
Subscribe to:
Posts (Atom)


